As written in the previous article, we recently committed ourselves to creating a package of Android applications connected to the respective ESP32 boards (Arduino compatible) dedicated to the control of civil and industrial systems. The project has the following characteristics:
- use of Arduino or compatible boards to keep construction costs low and allow free circulation
- use of applications created for the Android operating system for remote control of the systems and can be customized by the user independently
- updating and expansion of the project in successive steps
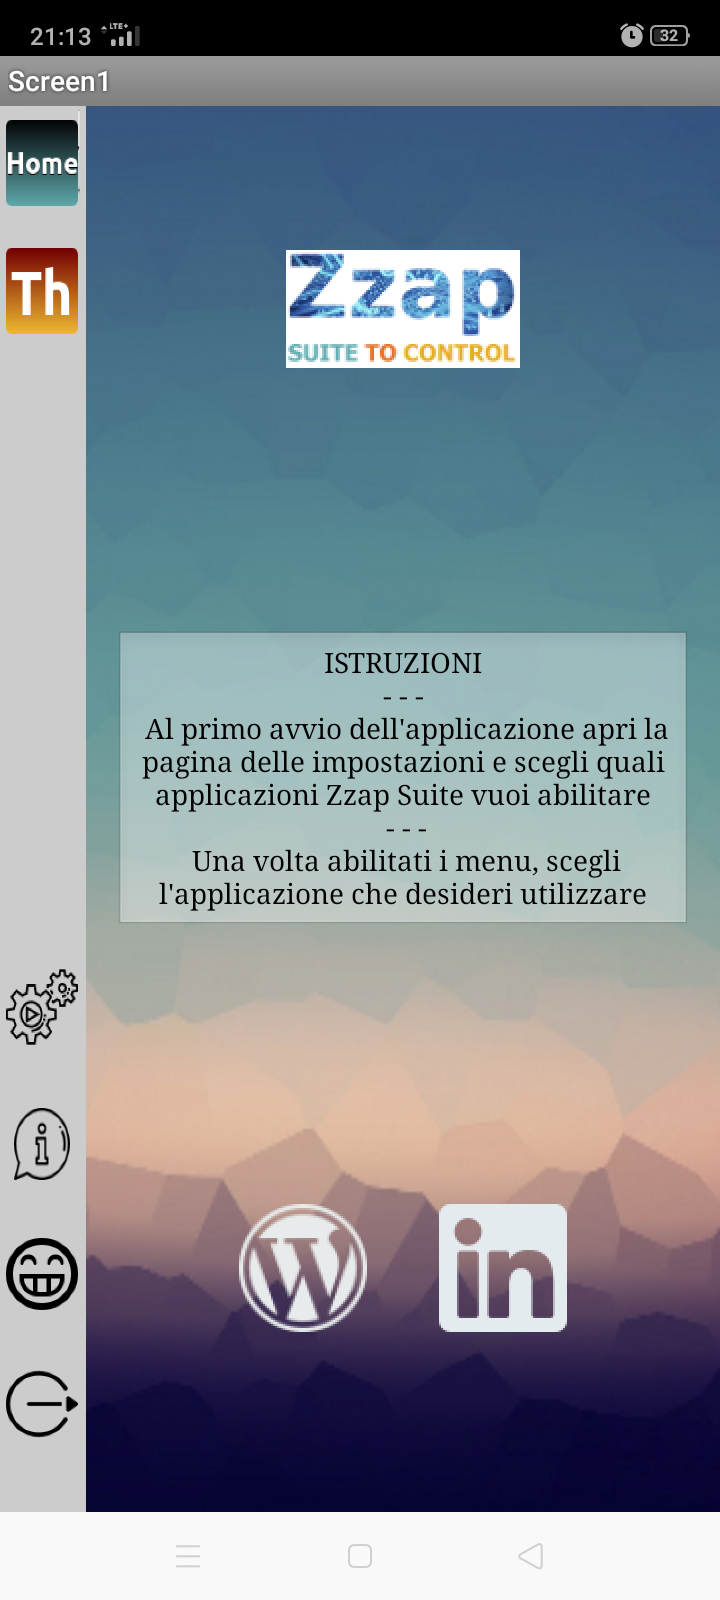
The philosophy, common to other projects, is to provide a functioning system, at low hardware cost, managed by an application that can be downloaded from the Play Store for free and simple to implement!
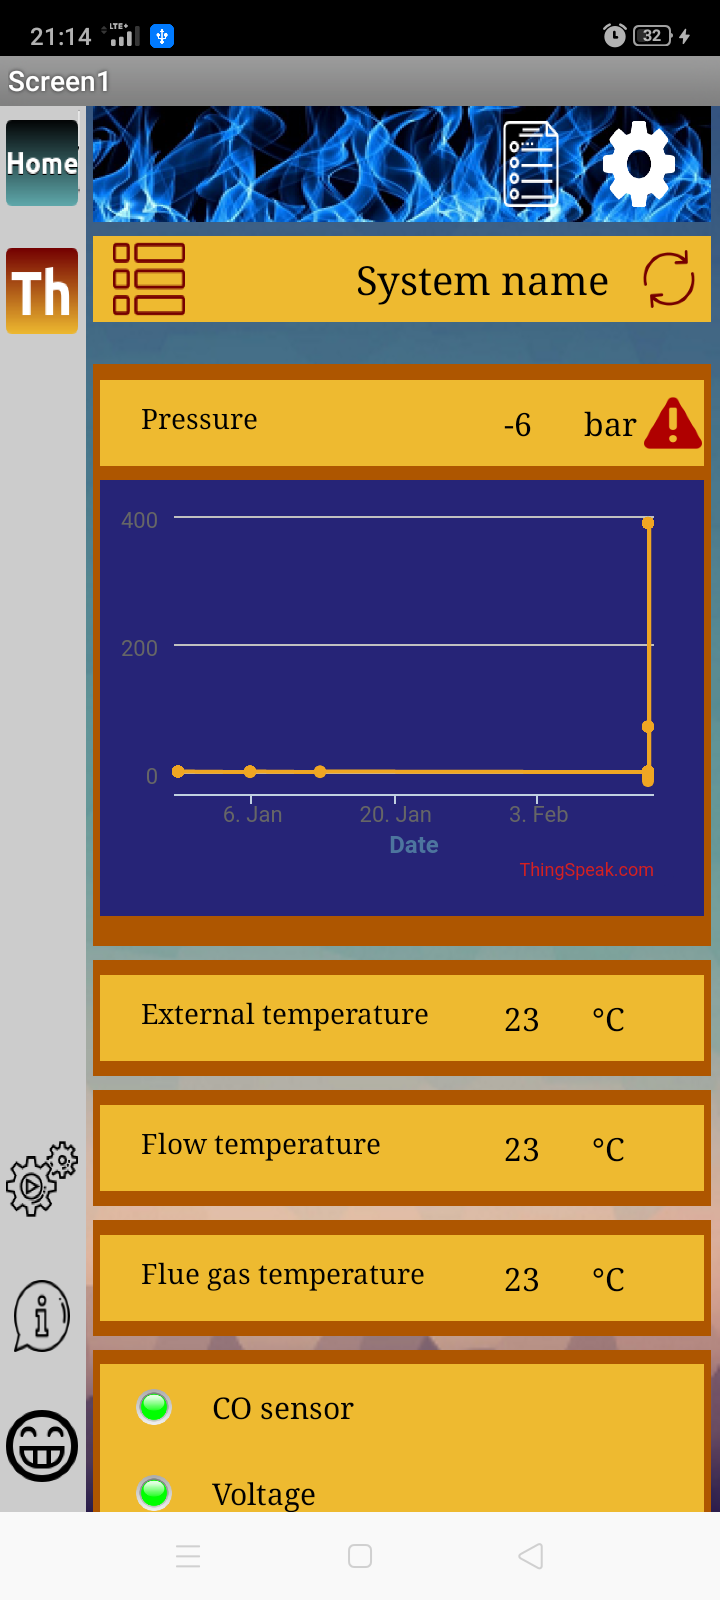
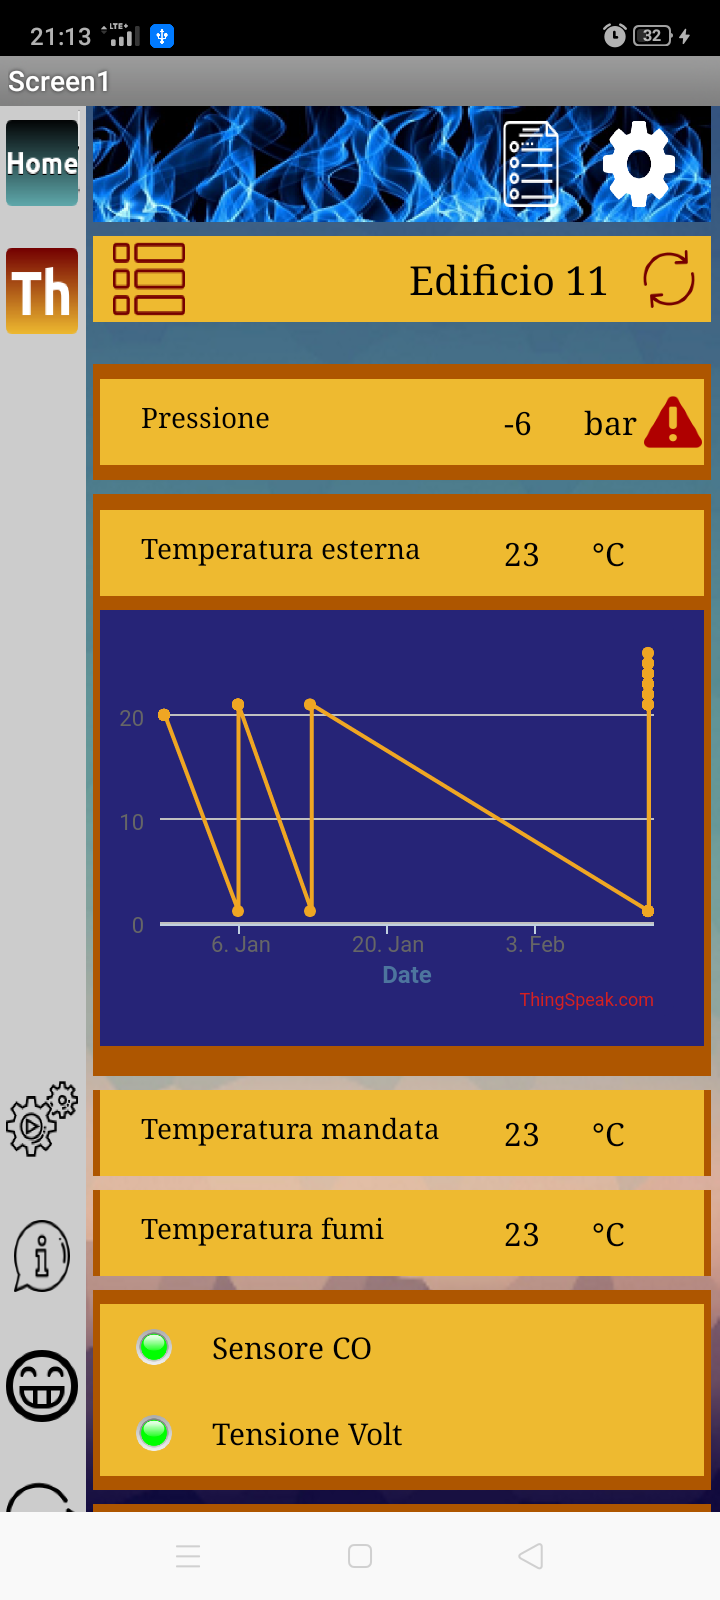
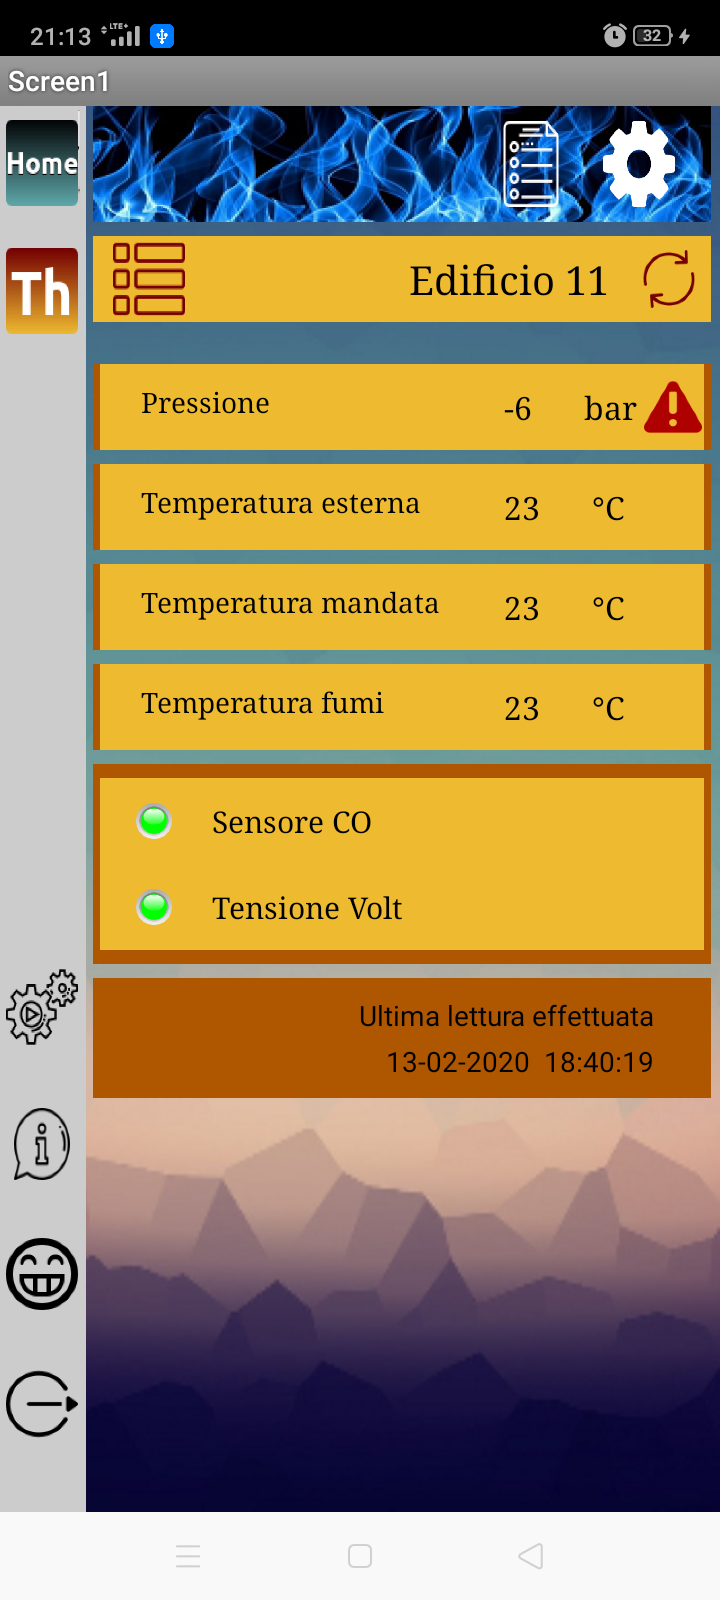
The first application created is dedicated to the control of heating systems and in combination with an ESP-Wroom-32 card it allows to measure and save some boiler parameters. The values we focused on at the moment are:
- vector fluid pressure – under development
- ambient outdoor temperature
- ambient internal temperature
- water delivery temperature
- exhaust fumes temperature
- power supply voltage – under development
- presence of combustion fumes inside the boiler compartment

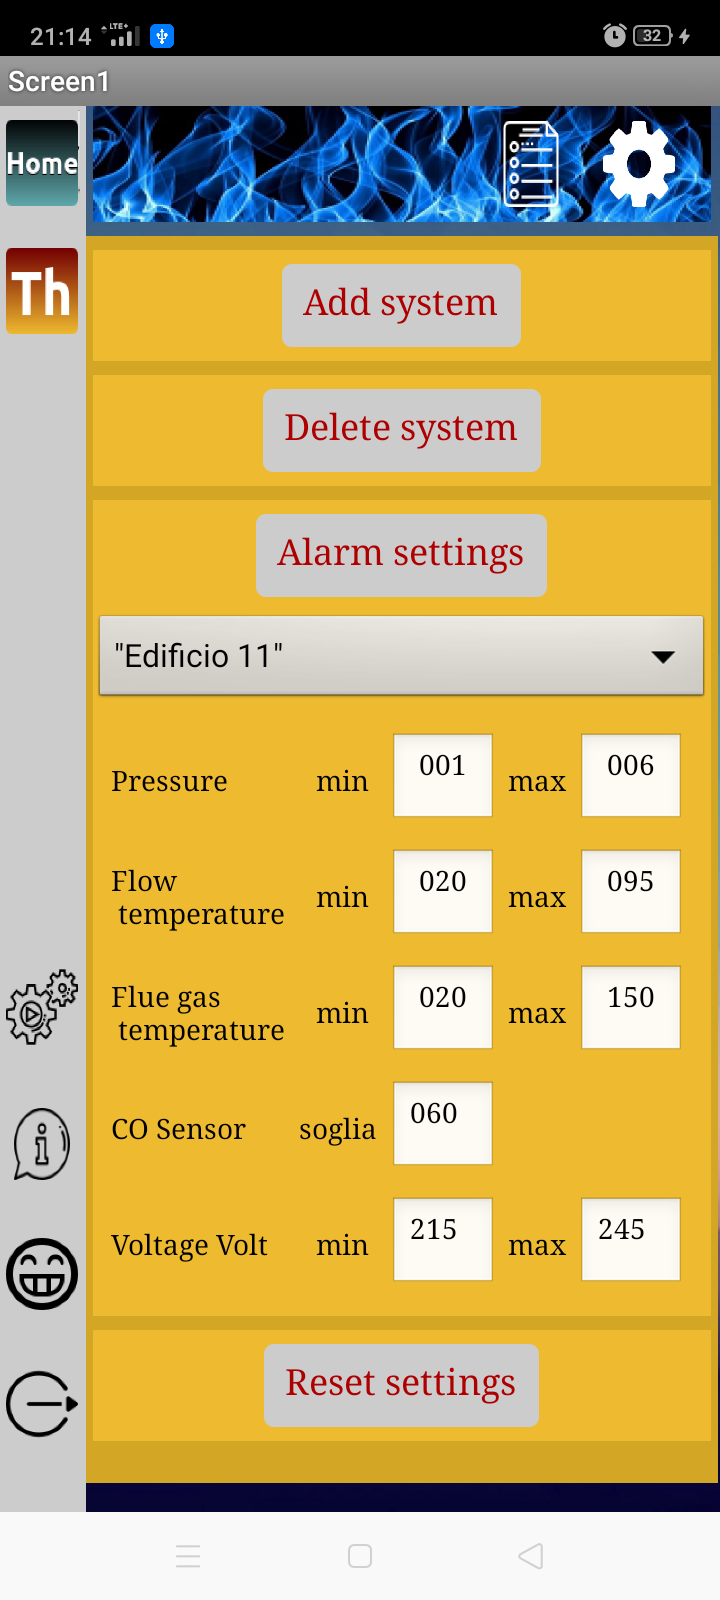
The card, through various sensors connected to it, collects the data and saves it in a database accessible from the internet (in particular Thingspeak) which can be accessed via the Android application. In addition, the card is configured to send an alert email (via the service offered by Smtp2go and customized according to the system and the event in progress) in the event of exceeding certain values. The alarm values are configurable from the Android application and the Wemos card automatically updates to them.
- n ° 1 ESP-Wroom-32 board
- n ° 1 20×4 LCD with I2C module
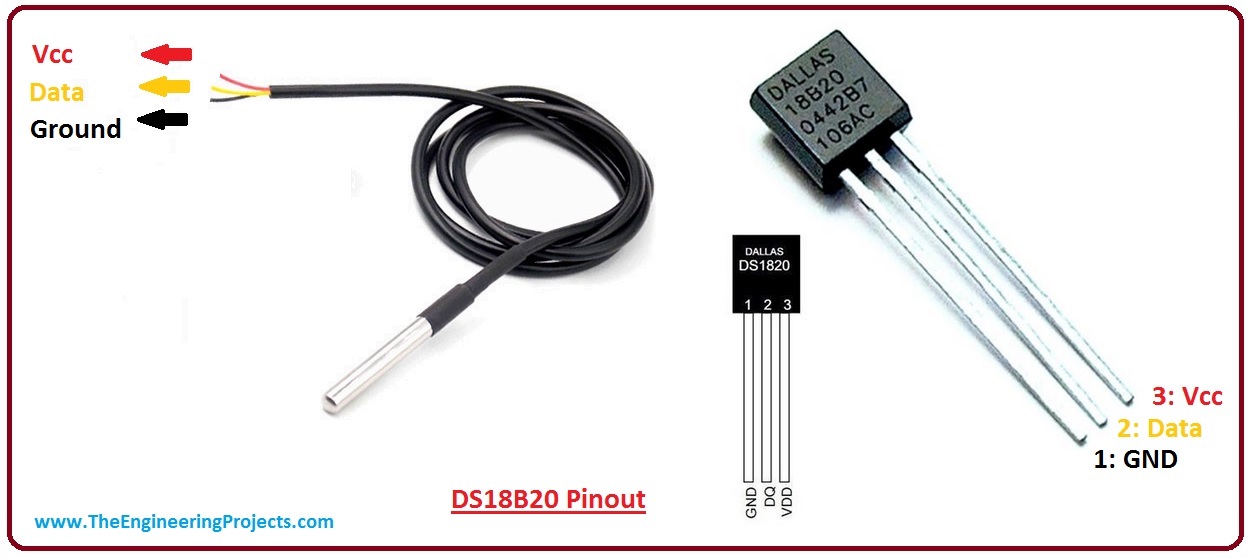
- n ° 3 DS18B20 temperature probes
- n ° 1 type K temperature probe
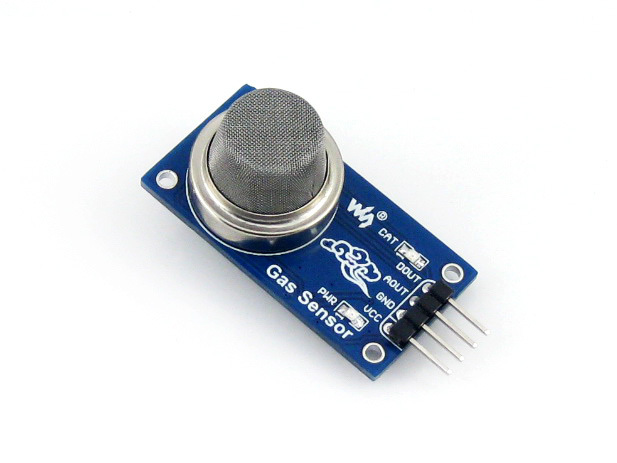
- n ° 1 carbon monoxide sensor type MQ-7
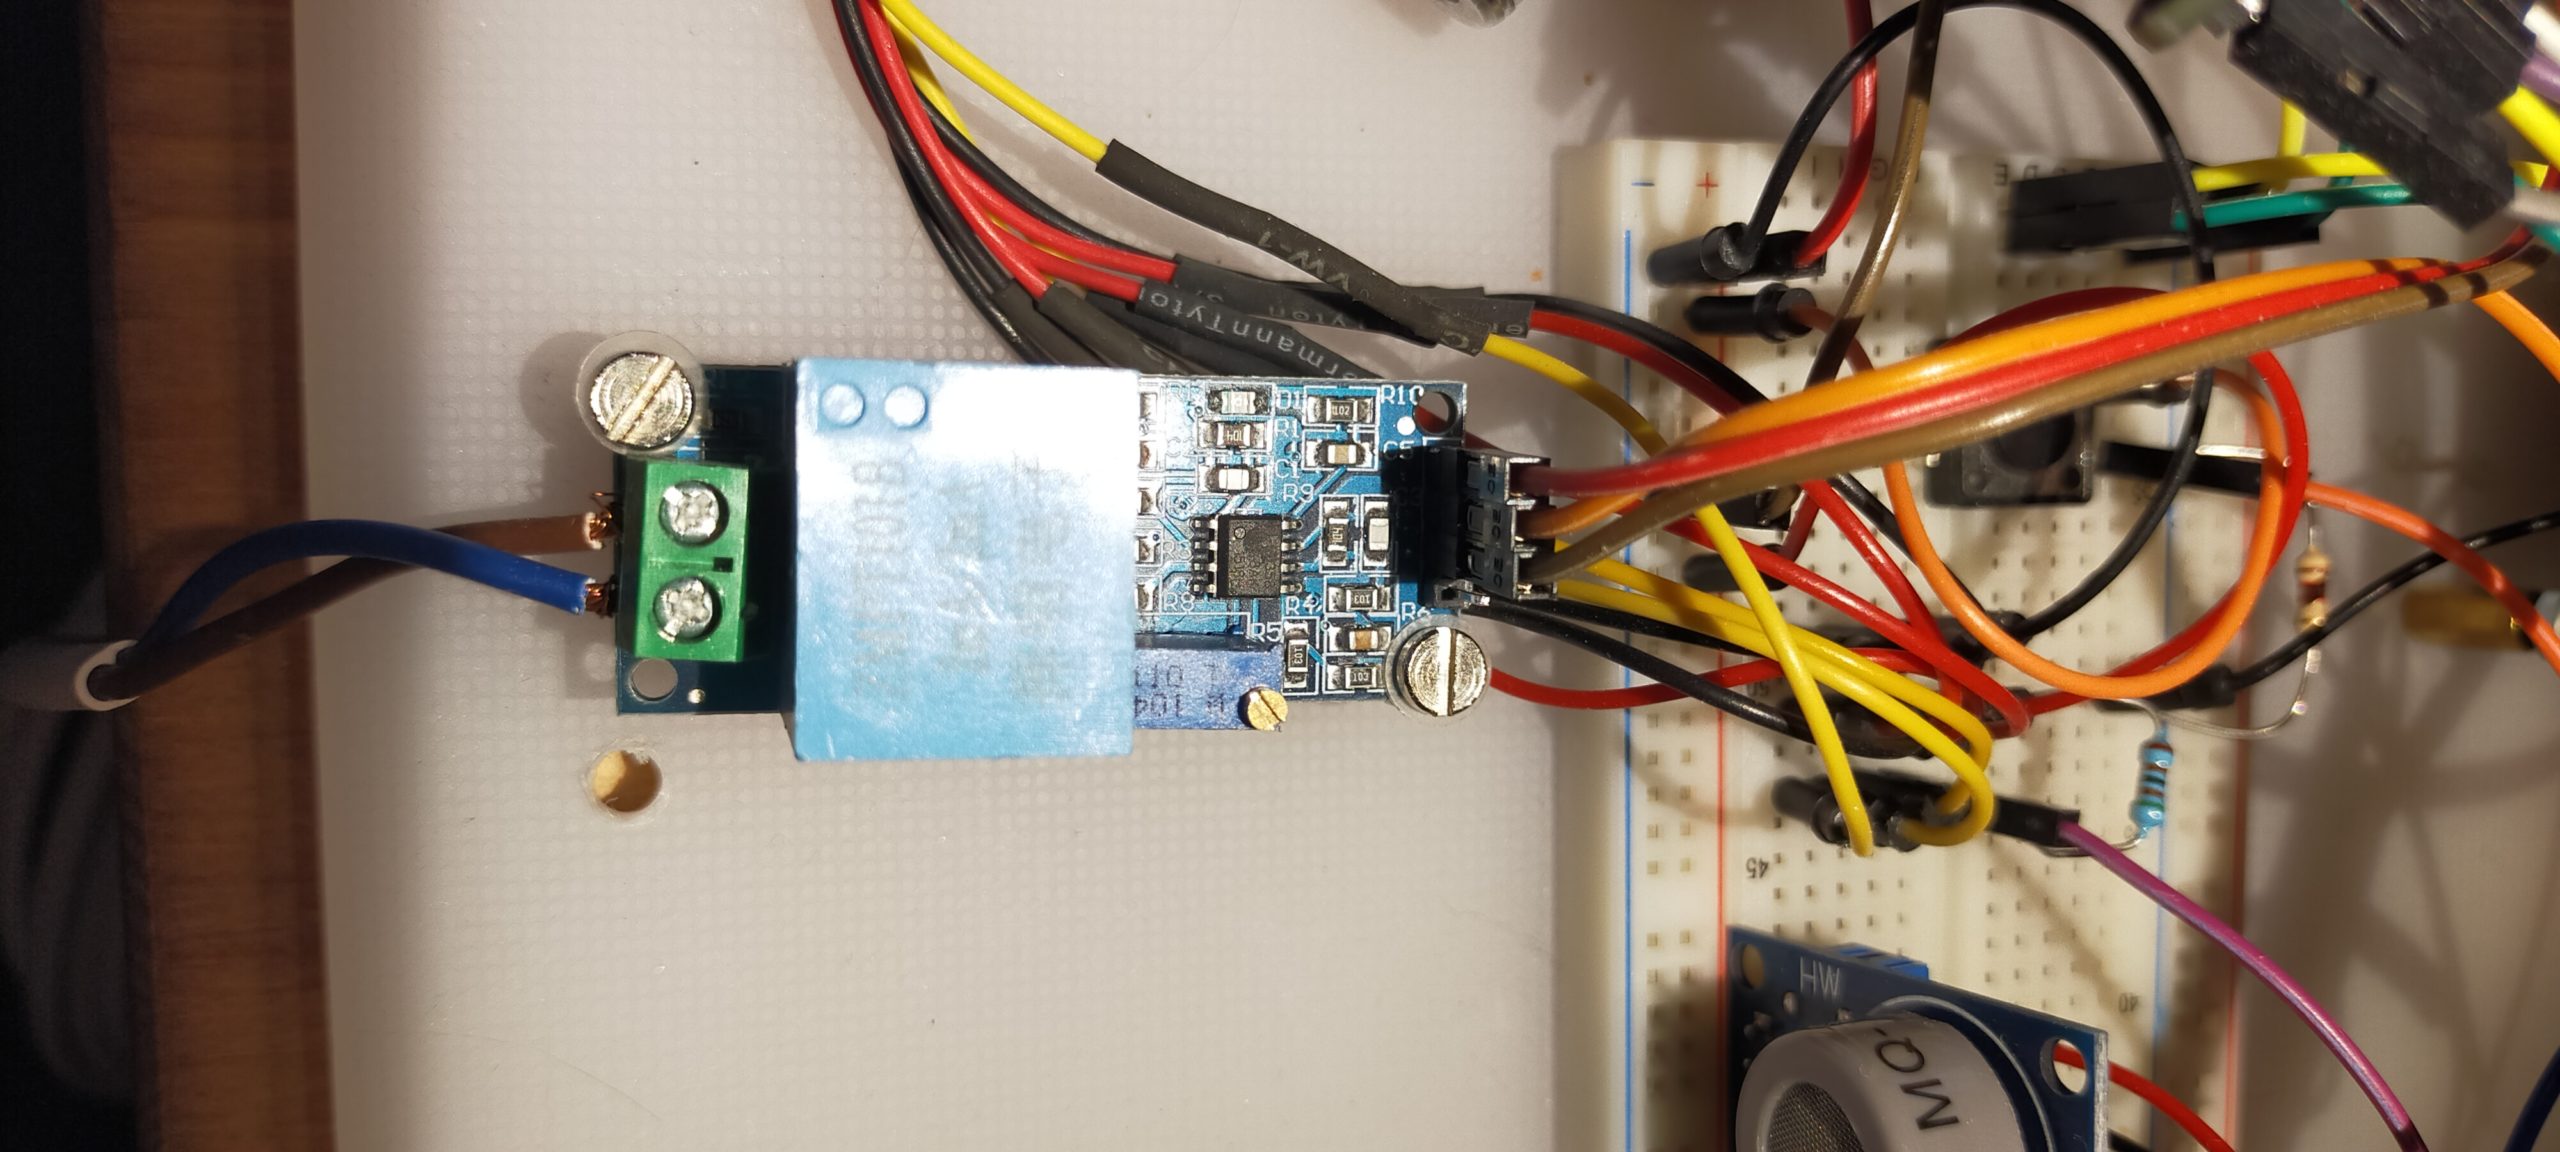
- n ° 1 voltage presence sensor
- n ° 1 button
- n ° 1 resistor 4,7 Kohm
- n ° 1 resistor 220 ohm
in addition to the common design equipment
- n ° 1 breadboard
- n ° 1 usb cable to power the board
- various jumpers for connections
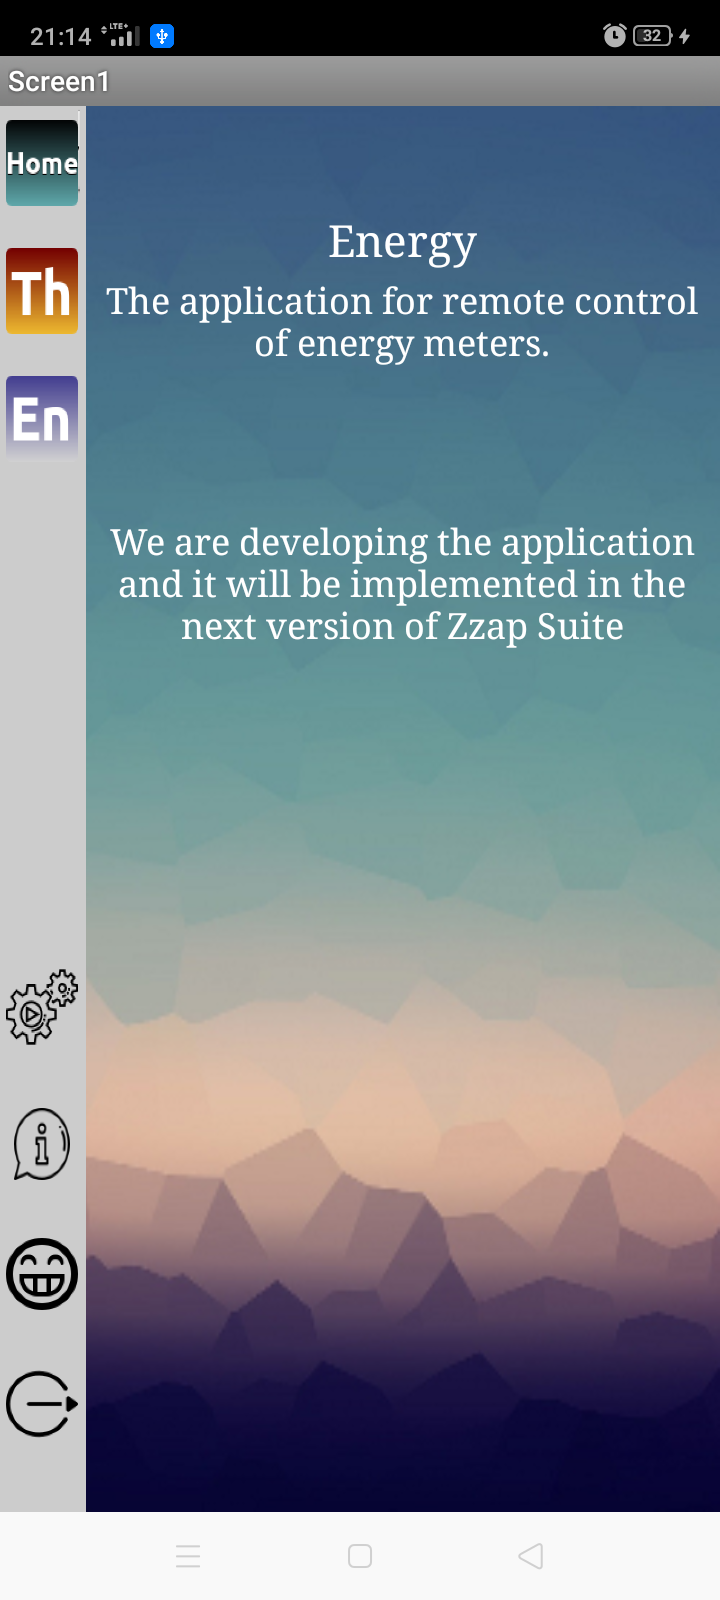
To allow remote viewing of the heating system data collected from the board, an Android application has been created that can be downloaded via the Play Store. The downloadable version is 1.0: it provides the visualization of the data saved on Thingspeak, the possibility of creating new channels and modifying the existing ones directly from the app and in the future the visualization in graphic form of the historical archives. We are also evaluating the possibility of sending commands to the board such as manual on and off (through controlled relays).
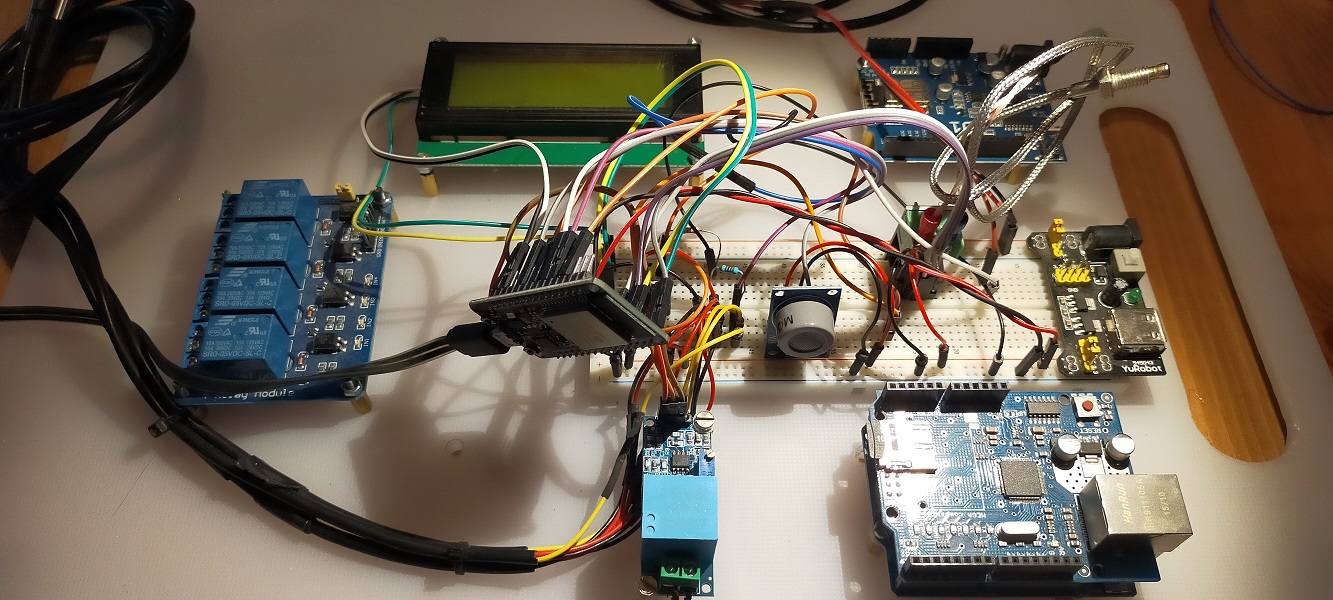
Practical realization
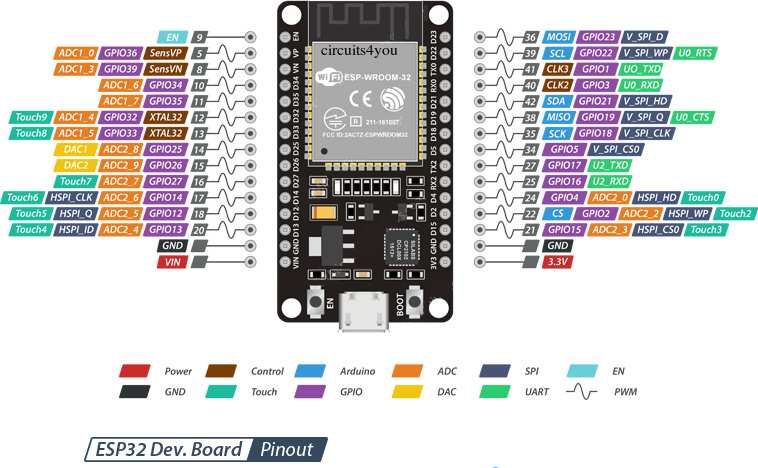
Let’s now dedicate ourselves to the connection of the various sensors with the ESP32 board.
Let’s see the links in detail.
The alarm acknowledgment button is connected to pin D34 configured as an interrupt. This solution allows us to start the assigned function at any time during the execution of the sketch. Put a 220 ohm between GND and D34 wire.
The three DS18B20 temperature probes are connected in one-wire mode via pin D32 as it allows us to save pins without penalty in reading. Note the presence of a resistance of 4.7K ohm between + 5Volt and the signal pin in pull-up function.
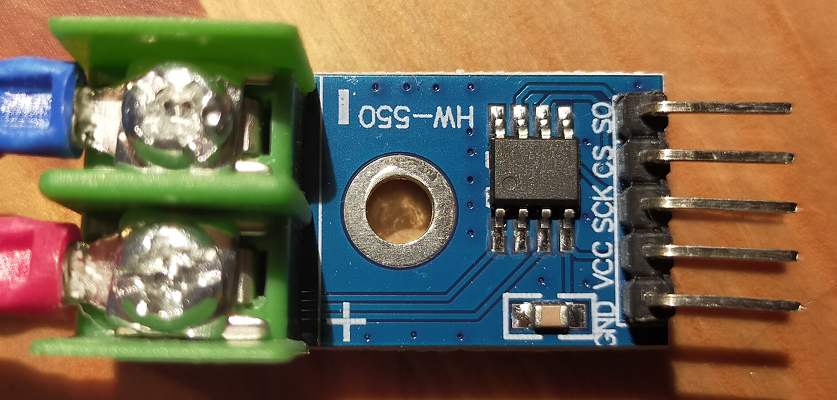
The type K temperature probe is different from the other two in that it will be installed on the fume exhaust pipe in the presence of high temperatures (even up to 180 ° C). This model of probe is made of steel with fiberglass covered wires to avoid the melting of the insulating stocking. When connecting the probe to the module, pay attention to the color of the wires and terminals … some probes on the market use the red color for the + and the blue color for the – (like the probe used by us) while others use yellow for the the + and the red for the -. No problem to connect it inverted but check that when the temperature rises, the probe returns a similar value, if not, invert the wires. The pins used by the probe are D5, D19 and D23.
The monitor is connected via an I2C interface which greatly simplifies the connection since only 4 wires are connected: positive (VIN), negative (GND), SDA (D21) and SCL (D22).
So to summarize:
HW-550 (Probe K flue gas temperature) SO (D19) – CS (D23) – SCK (D5) – VCC (+) – GND (-)
Button (to acquire the alarms) pin 1 (+) – pin 2 (D34 and via a 220 ohm to GND)
LCD screen (via I2C adapter) SCL (D22) – SDA (D21) – VCC (VIN) – GND (-)
Pressure sensor IN (+) – GND (-) OUT (D33)
DS18B20 (3 temperature probes) VIN (+) GND (-) Signal (D32 and via 4,7Kohm resistor to +)MQ-7 (CO sensor) VCC (+) GND (-) AD (D14) (implementation in progress)
![]() We are testing the libraries for the use of the CO sensor MQ-7 and the module for measuring the supply voltage of the heating system. These sensors will be added to the sketch soon.
We are testing the libraries for the use of the CO sensor MQ-7 and the module for measuring the supply voltage of the heating system. These sensors will be added to the sketch soon.
Configure Thing Speak
The data collected by Zzap is saved on the database offered by Thing Speak. In order to use this service it is necessary to register for free on the site. Click here to access the registration page.
Enter a valid email address as you will then need to activate your account via a link sent to your mailbox. Once you receive the email, click on the link included and you will be redirected to the site by activating your account.
Once connected with your account go to Account – My Profile and save the User API Key that you will find on the page (you will be asked by the Zzap Suite application).
Configure SMTP2GO
To send emails directly from the ESP32 card to your mailbox you need an SMTP server that redirects emails without requiring an SSL connection. Then click on this link and you will be directed to the SMTP2GO user registration page. Click on the central “Sign up FREE” button and fill in the form with your details. As before, upon receipt of the confirmation email click on the link and confirm your new account. Log in on the page and go to configure the service: Settings – SMTP Users and create a new “user” with ADD SMTP User. As Username choose the email address with which to send the alarms (the password is irrelevant for our project) and save.
The username you have chosen will be saved in the Arduino sketch on the “secrets.h” configuration page under SENDER.
- Zzap Suite Thermo – sketch for Arduino
- Zzap Suite on the Google Play Store – Android application page
- Thing Speak – database on the internet
- SMTP2Go – SMTP service to be used for sending emails